
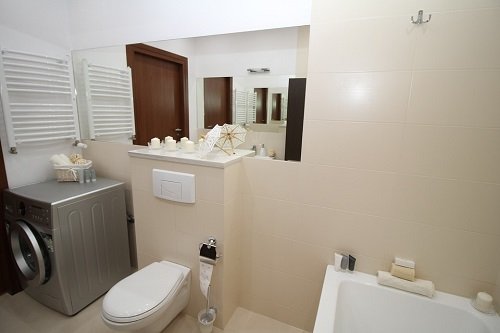
Bathroom remodeling can be a very challenging project that requires you to be very keen and detailed every step of the way. Every homeowner needs to get the right measurements when replacing a toilet system. It’ll be very frustrating if you bring home a new toilet only to realize that the unit is either too small or too big for its designated bathroom space. Furthermore, even if you try some workarounds and make it fit, you’re likely to run into serious plumbing complications down the road. Therefore, it’s only wise to measure the toilet rough-in and get it right the first time before you start thinking of the perfect brand for your toilet. In this guide, we highlight how to replace an 8-inch rough-in toilet like a real pro!
How to Replace an 8-inch Rough-in Toilet
The distance from the center of the toilet’s closet flange and to the rear wall should be sufficient to accommodate a toilet unit. An 8-inch rough-in distance clearance is likely to cause serious installation problems. That is why most established toilet brands manufacture toilets that require a distance clearance of about 10, 12, and 14 inches between the flange and the wall. But, if you encounter a unit with an odd rough-in size, there are certain ways you can solve the short drain clearances.
Solutions To 8-Inch Rough-In Toilets
If you find yourself in a situation where you need to replace an 8-inch rough in toilet with the modern 12-inch or 14-inch models, here are a few tricks to solve the problem:
1: Install Wall-Mounted Toilets
One way of solving the 8-inch rough-in issue in your bathroom is to stop using it altogether. But, since you don’t want to stop using your bathroom entirely, you can install a wall-mounted toilet instead. A wall-mounted toilet model drains through its rear side, whereas a floor-mounted toilet drains through its bottom surface.
If you choose to replace your existing 8-inch rough-in toilet setup using this method, you need to be aware that you’ll need to plumb a new waste line to your toilet. Wall-mounted toilets are increasingly becoming very popular in the new apartment buildings, especially in cities, since they conserve space and are easy to maintain.
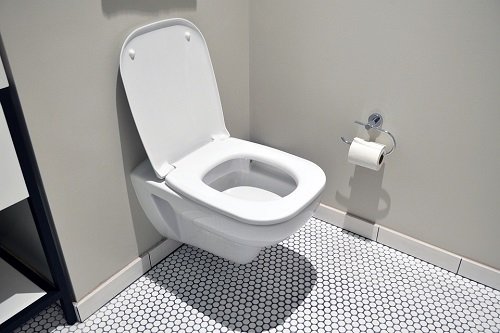
Furthermore, some wall-mounted toilers sit flat on the ground like standard toilet models but have a rear side that touches the wall and connects with a wall drain stub. So, if you notice that the new wall-mounted toilet you just bought doesn’t hang from the wall, don’t be surprised. Depending on your type of commode, you may need to obtain professional help for the project.
2: Use Offset Commode Flange
The other bathroom remodeling option you have is to change the commode flange drainpipe with a 1- or 2-inch offset flange. This is an inexpensive way of replacing your 8-inch or 9-inch rough-in dimension scenario and installing a 10-inch rough-in toilet. It’s a good solution that replaces toilet rough in dimensions that sit too close to your basement wall.
A commode flange is a term used to refer to the electrical drain outlet connection device where the commode is fixed. Your setup may have a conventional flange shaft protruding under the flooring surface to attach to your toilet’s sewer drain pipeline. Therefore, the balancing out capacity of your new Offset Commode Flange should be 1 or 2 inches.
In other words, the replacement allows you to move the center of your toilet from the wall surface by 1 or 2 inches. But if your setup is 8/9 inches, you can then enhance its rough-in size to 10 inches. That certainly means you can invest in a better rough-in commode such as the 10-inch Toto Drake bathroom.
This 8-inch rough-in dimension solution is not only the cheapest but also the quickest way of solving your issue. Remember, you might need to sculpt out your bathroom for you to replace your 8-inch rough-in with a countered flange.
3: Renovate Your Walls
Consider renovating your wall while you execute those bathroom improvements. The wall renovations should mainly focus on increasing the rough-in distance clearance between the wall surface and your toilet’s drain. In essence, if you want to replace the 8-inch rough-in toilet set up to accommodate a 10-inch rough-in toilet, then you need to move your wall back by two inches.
However, the only type of walls you can safely move without the help of a professional contractor in a DIY bathroom remodeling project is the partition walls, also known as non-load-bearing walls. In most cases, and to be on the safe side, it’s recommended that you consult with a professional before you proceed.
Other solutions
Dealing with insufficient distance clearances can be challenging. Building codes require bathrooms to allow users to comfortably sit and use their limbs safely while using the toilet. Additionally, these clearances are even greater when building accessible bathrooms as compared to the standard bathrooms in many homes.
Most building codes will require you to have a clearance of at least 15 to 18 inches on both sides and a clearance of 2ft from the next plumbing fixture to the bowl’s tip.
While renovating your walls may help you meet accessibility clearances as required by law, you can take advantage of smart design to meet these requirements. You can cleverly rearrange the locations of your shower and sink to create the space required by the building codes.
Here are some additional factors to consider when figuring out how to replace your 8-inch rough-in toilet:
- Older homes with compact bathrooms often have round-front bowls that can comfortably fit a rough-in size of 10 inches.
- A 12-inch rough-in size lets you try out different toilet styles and bowl shapes because it’s the most standard measurement.
- The 14-inch rough-in size is suitable for larger bathrooms. And just like the 12-inch rough-in setup, it offers you more variety in terms of toilet styles.
Before you start shopping for the next toilet to replace your existing unit, you need to be organized and accurately measure your bathroom’s size. Measure the designated toilet space a few times to ensure everything is consistent. Note, you don’t want the back of the toilet to flush up against your walls! Therefore, getting the correct measurements before buying and installing the toilet will save you some bucks down the road.
Wrapping Up
Knowing the right distance clearance of your toilet to adjacent walls is very important when buying a new toilet unit for a bathroom remodeling project. The right clearance between a wall and the toilet unit is recommended for comfort and accessibility. Feel free to share your experiences when it comes to dealing with odd rough-in toilet sizes.