
Push Button Toilet won’t Flush: How To Fix The Problem
Unlike older toilet models that had a lever-style flush handle, newer designs come with a push button that operates the flushing mechanism when pressed. It’s common for the toilet push button to fail and stop flushing despite how vigorous you press the button. When the button fails, it feels loose than usual, and water doesn’t come down the toilet pan. Figuring out why the push button toilet won’t flush properly can be messy and frustrating. Regardless of whether the push button is installed on the side of the cistern or the top or front of the cistern, the process of fixing the issue is the same.
Here are some of the reasons why your push button toilet won’t flush:
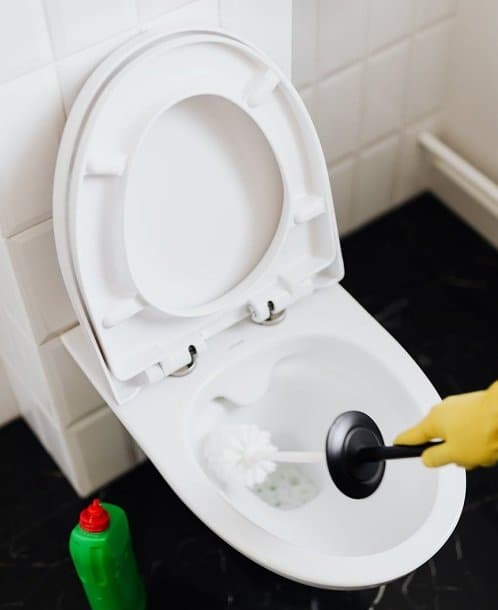
1: Your Toilet Is Clogged
Attempting to flush cloths or anything other than toilet paper down your toilet can cause clogging. That is why it’s advisable to avoid using thick toilet paper when handling your business in the toilet. Using sanitary napkins or too much toilet paper can also clog the pipe and make flushing impossible.
Sometimes, random debris and large waste can partially clog your toilet pipes over time. Although such debris won’t necessarily affect non-clogging toilets, they can completely block the water flow, causing a weak flush.
These minor clogs are like small obstacles in the pipes that hinder the smooth flow of a flush. If the push button has to work harder to activate the flush, the end result is releasing a weak flush. As a result, you’ll get an incomplete flush that leaves behind a disgusting mess in your bathroom. You might even see some water returning through the flange after flushing.
The Solution:
You should try to unclog the toilet pipe if the clogging is not extensive. Simply remove the unwanted items that have blocked your toilet pipes with a hooked metallic rod. Start fixing the clogging problem by plunging the toilet with a drain plunger for about 10 to 20 seconds. Once you’re done, press the push button to see whether the flushing has improved.
You can repeat this process up to four times to gauge the extent of the clogging. However, you shouldn’t plunge too hard as that may cause other problems in your flushing system.
If the clog is due to product corrosion or too much debris that is caked onto your piping walls, unclogging the toilet manually can be challenging. If that is the case, consider turning off the water to the toilet and adding hot water to the bowl. Let the hot water sit in the bowl for a few minutes, then try flushing it down the drain.
If that doesn’t work, then that means the clog is deeper down the pipes close to the sewer line. At this point, you can only solve the clogging issue by getting help from a professional plumber.
2: Water Level is Too Low
Sometimes, it’s possible to find that the water in your toilet’s tank is more than one inch below the top of the toilet’s overflow tube. At this level, you’ll feel like there is no resistance behind the push button when you press it.
The water level may be too low if the water valve is turned off, even if the pressure is flawless. It’s, therefore, crucial to ensure that the valve is always turned on and the water level refills to the required level. Furthermore, your toilet won’t be able to flush large waste completely and leave the toilet bowl clean if the water level is too low.
The Solution:
Your toilet tank should have “the correct tank level” to achieve a successful flush. Some manufacturers actually leave a mark on the tank to guide users in knowing the right water level. If you feel the toilet’s flush only trickles too little water or doesn’t work completely, consider checking whether the water level reaches the mark that is usually on the inside of the tank.
If you’re the one who adjusted the water level manually, you need to return it to the recommended manufacturer’s mark. Consider replacing any misaligned tank components that may be preventing the water from filling properly.
3: The Flapper is Warped
The rubber flapper that is designed to release water when the push button is pressed or pushed may be bent or warped. The flapper, just right under the toilet lid, is integral to the toilet’s flushing mechanism.
The flapper basically releases water when flushing and closes the water intake hole to ensure the toilet tank holds the right amount of water at all times. So, if the flapper appears too warped, deteriorated, or bent, it has to be replaced.
The large rubber ball is responsible for preventing an overflow because it rises to close the intake hole when the water rises in the tank. Try to bend the float ball’s arm slightly upwards. Turn the adjustment screw on top of the valve to raise the float.
The Solution:
Check the length of the flapper chain to ensure it’s appropriate and in good working condition. You need to make sure the flapper closes the hole when your toilet is not in flush mode.
You should also make sure the slack in the chain is not too little or too much. You’ll need to adjust the length of the chain and re-hook it to a hole that is closer to the push button. Check the flapper itself to ensure the chain’s length is fitting.
Replacing the flapper-chain mechanism is not that difficult. Follow these steps to replace your flapper:
- Start by removing the detached flapper and turn off the water supply to your toilet
- Flush all the way to ensure the tank is empty
- Next, unhook the chain from the arm to remove the flapper
- Take pictures of the old flapper or bring it along to the store when buying a new flapper if you’re unsure of the required size.
You need to follow the exact installation instructions when installing your new flappers because different flappers are designed to work differently. When properly installed, it should snag. You can test if the flapper is working perfectly by pouring some water into your toilet’s tank.
Relax the flapper with a little slack by attaching a lift chain so that it’s not too loose or too stretched. Test whether the flapper is working seamlessly before you turn on the water supply into your toilet. In most cases, replacing a badly damaged flapper requires a plumber.
4: Blocked Inlet Holes
When the inlet holes are blocked, you may end up losing a lot of water that could have been used for flushing the toilet. You’ll know the holes are blocked if there is no water leaking on the toilet bowl’s side.
Another sign of blocked holes is water streaming straight down rather than diagonally. Leaving water to stream on the side of the toilet bowl for several hours can cause serious water damage in the entire house or even put a dent on your utility bill.
The Solution:
Use a mirror to assess the extent of blockage under the toilet seat. With a small mirror, you can actually examine the condition of the inlet holes.
If the holes are clogged, follow these easy steps to unblock them:
- Heat a small amount of vinegar to about 129 degrees
- Pour the hot vinegar through the overflow pipe
- Let the vinegar sit overnight
- Use a wire or an Allen wrench to unblock and clear the inlet holes.
Mineral deposits or bacteria can block the tank’s inlet holes and affect your toilet’s flushing system. These are recurring issues, so it’s prudent to check and unblock the holes, if clogged, periodically. If the holes are blocked by mineral deposits from hard water creating a light-colored layer on the walls, consider investing in a water softener.
5: Poor Design of Drain Pipe
If you keep experiencing this flushing problem every now and then, your issue might be with the installation or design of toilet drains. In essence, the drains ought to have a downward slope to allow wastewater to flow down the bowl to the main sewer system through the pipes.
If the toilet drains don’t have a downward slope, you’ll end up with a pool of water stuck in your pipes. This means every time you try flushing your toilet, the wastewater hits the stuck water and doesn’t flow down the bowl.
The Solution:
Hire an experienced plumber to take a look at your toilet drains and redesign them if necessary. Sometimes, if your budget can allow you to, investing in a no-touch flush toilet may save you from these huge maintenance costs.
Top-flush toilets are operated by pushing a button to activate the flush mechanism. If the toilet won’t flush, it’s likely there is an issue with the flushing mechanism. By following the above-mentioned steps, you can quickly diagnose and fix the problem even without contacting a plumber.
Wrapping Up
Sometimes, fixing the push button issue is as easy as replacing a small part of the toilet, depending on the brand. While some of the reasons as to why your toilet doesn’t flush can be fixed quickly, others may require you to hire a licensed plumber.
To protect yourself from the costs associated with complex plumbing repairs, hire an experienced plumber who can get the job done right the first time. This is very important because if fixed poorly, a simple plumbing repair may escalate into a costly project in case you experience water damage to your home. Furthermore, hiring the services of a professional may help you utilize your insurance coverage and avoid unexpected expenses.